What Glazing Putty Is
Glazing putty is a mixture of whiting (ground calcium carbonate) and raw linseed oil. The whiting provides bulk and workability; the linseed oil is the binder. Over time, the oil polymerises through contact with oxygen, converting the putty from a plastic material to a hard, mineral-like compound. This curing process is gradual and continues for several years after application.
Modern putty sold in large quantities for the building trade is generally adequate for repair work but is sometimes over-oily as supplied, which can extend curing time and cause sagging on vertical surfaces. Traditional timber merchants in Poland often stock higher-quality formulations. The key indicator of good putty is that it holds a shape without slumping after being pressed into a ball and left for a minute.
Preparing Putty for Use
Putty from a tin that has been stored for some time may have a firm skin. This is removed and the interior material is kneaded on a clean board or in the hands. Kneading serves two purposes: it homogenises the oil distribution throughout the mass, and it warms the putty slightly, improving workability.
If the putty is too soft and sticks to surfaces, some of the excess oil can be reduced by pressing the mass onto a piece of clean absorbent board (unprimed MDF or plywood works) for a few minutes. The board draws off surplus oil, leaving a firmer material.
If putty has dried hard throughout the tin, it cannot be reconstituted. A small amount of raw linseed oil can sometimes soften putty that is only slightly over-cured at the surface, but this is unreliable and fresh putty is the better option.
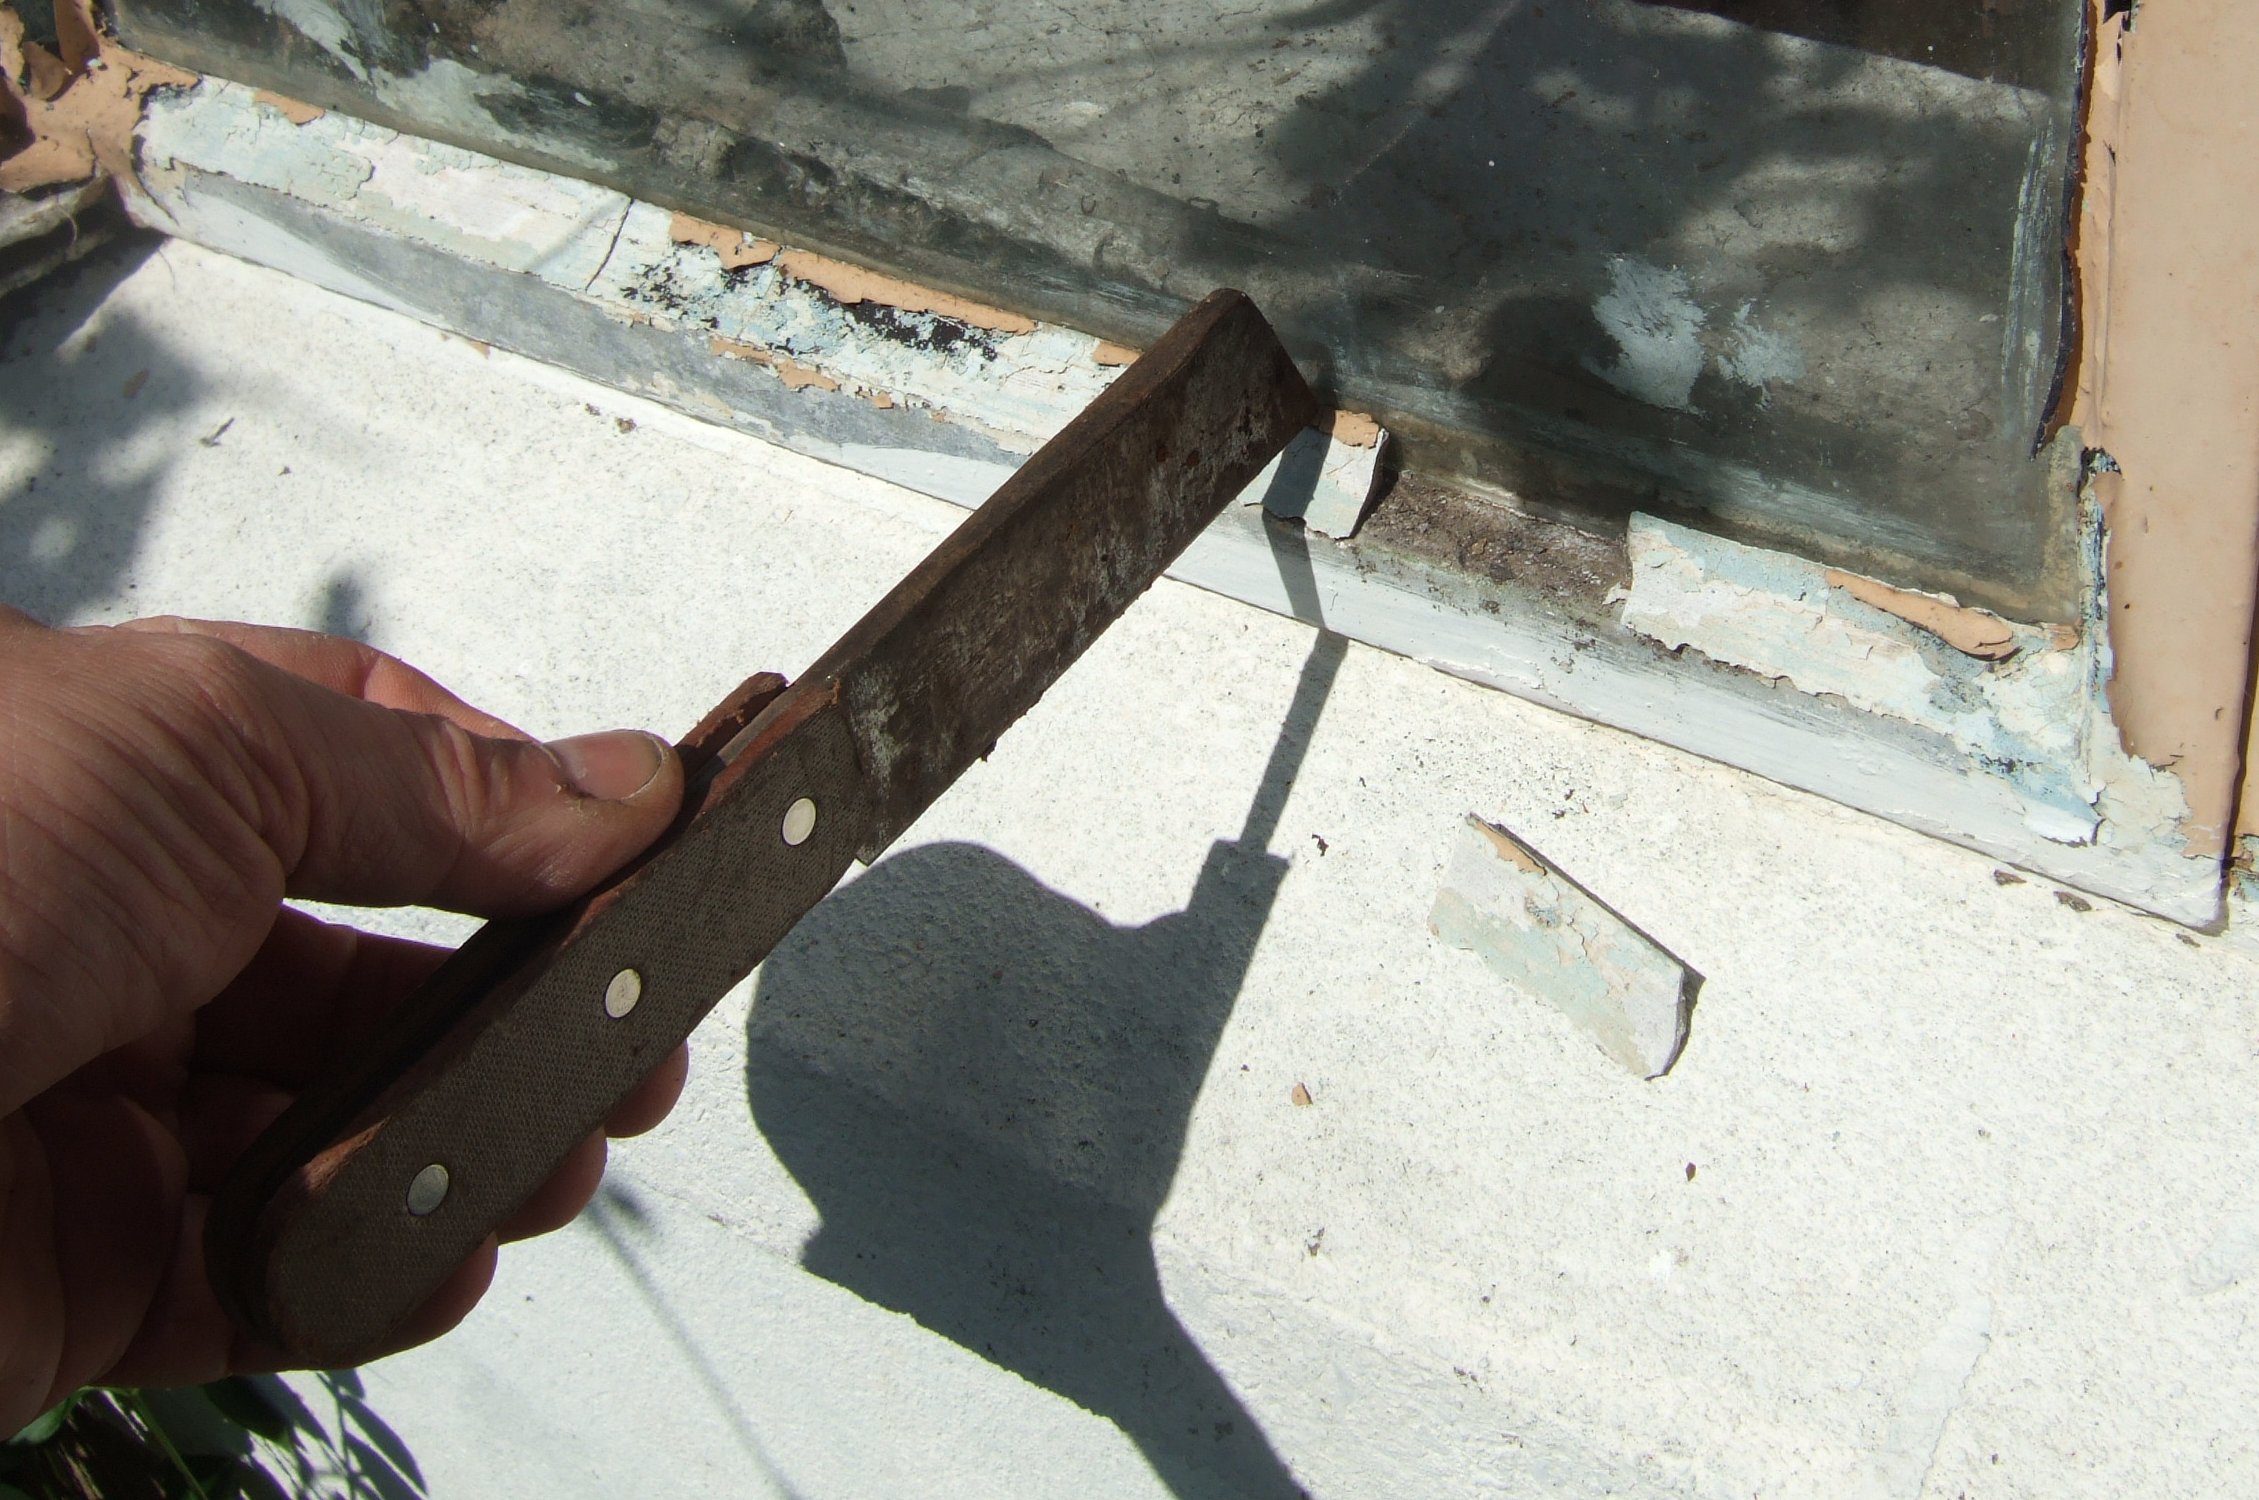
Tools Required
The basic kit for glazing: a hacking knife (a stiff, angled blade for removing old putty), a putty knife (a flexible, angled blade for striking face putty to angle), glazing sprigs or clips, a hammer for sprigs, linseed oil for priming the rebate, and a brush for application.
Preparing the Rebate
Old putty is removed with the hacking knife. Working along the putty line at an angle, with controlled force, lifts material without damaging the glass. Glass removal may be necessary where putty has been applied heavily over previous coats and has become difficult to cut through without pressure.
The bare timber rebate is primed with a liberal coat of raw linseed oil applied with a brush and left to absorb for 15 to 30 minutes. Any standing oil that has not absorbed is wiped off. This priming step is the most commonly skipped, and its omission is the most common reason that new putty dries too quickly and cracks within a year — the dry wood draws oil from the putty before it can polymerise normally.
Back-Puttying
A thin layer of putty — roughly 2 to 3 mm — is pressed into the primed rebate before the glass is placed. This is back putty or bedding putty. It serves as a seal between the glass and the wood, preventing water from sitting in the rebate and as a cushion that absorbs minor movement in the frame without transmitting stress to the glass edge.
Back putty should be applied thinly and evenly. Excess material is squeezed out when the glass is pressed in and is removed with the hacking knife before it sets.
Fixing the Glass
After pressing the glass into the bedding putty, it is secured with sprigs — small, flat, headless nails — driven flush with the timber surface at intervals of roughly 200 mm along each side. Sprigs should not be forced tight against the glass; a slight gap allows for expansion. Traditional pins are cut steel; modern equivalents are zinc-plated for durability.
Metal spring clips, used in steel-framed casements, are the alternative fixing method where sprigs are not appropriate.
The glass should be held in place by sprigs before face putty is applied. Face putty supports the glass against wind load but is not primarily a fixing device — that function belongs to the sprigs.
Striking Face Putty
Face putty is rolled in the hands to a rope-like form and pressed firmly into the angle between glass and timber with the thumb, working along the full length before using the knife. A putty knife drawn at a consistent angle — typically 45 degrees from glass to timber — in a single pass produces a clean, flat bevel. Multiple passes tend to drag material and create an uneven surface.
The putty knife should be dipped in a small amount of linseed oil periodically to prevent dragging. Water-based lubricants are also used by some practitioners, though the interaction with oil-based putty can occasionally affect adhesion.
Curing and Painting
Linseed oil putty cures through oxidation. The outer skin forms within a few days in warm weather with good air movement; deeper curing takes considerably longer. Painting over uncured putty traps the volatiles and prevents normal hardening. A practical minimum is two weeks in warm conditions, four weeks or longer in cold weather below 10°C.
The first paint coat serves primarily as a seal and should overlap the putty-to-glass line by 1 to 2 mm to seal the joint. This overlap prevents water from tracking between putty and glass — a common path for moisture ingress. Paint should not extend more than 2 to 3 mm onto the glass surface, as a wider band obscures interior light and creates a condensation-prone shadow zone.